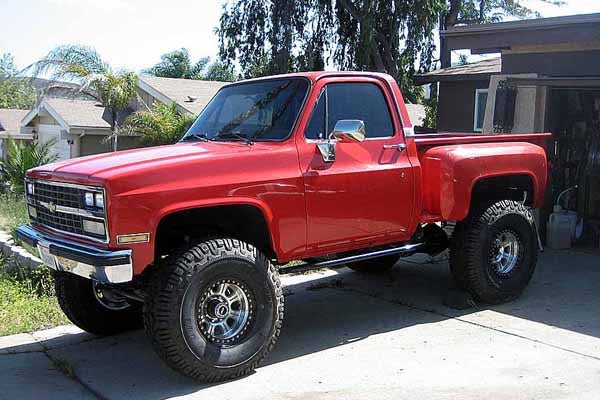
It’s been a while since we have reported on Project Big Bad Chevy but, after a lot of work, we finally have this truck where it needs to be. We fully rebuilt and installed the rear 14-bolt axle and reconfigured the drivetrain as well as many other details to make this project come together.
First, we had to rebuild the rear 14-bolt axle. We started by tearing it completely down for inspection. While the bearings and seals seemed to be in good shape, we decided to replace everything while we were in there. 4wdfactory.com sent us a complete bearing and seal kit to be used in the rebuild. It had everything we needed!

Next we needed to upgrade the ring and pinion along with the locker. To match our front Dana 60 axle, Superior Axle & Gear sent a new 4.88 ratio ring and pinion and Eaton sent a No-Spin locker. The No-Spin allows for 100 percent traction to both rear wheels yet has the ability to automatically unlock during a tight turn to allow for different wheel speeds. The only issues we had installing the ring & pinion and locker was the fact that we needed to swap the G80 carrier with an open carrier to allow the new locker to fit correctly and the spring perches on the axle needed to be relocated. We cut the stock perches off and welded on a set of very beefy perches from Off-Road Designs.
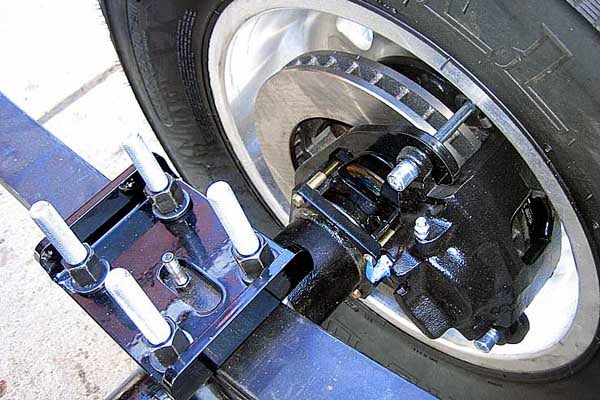
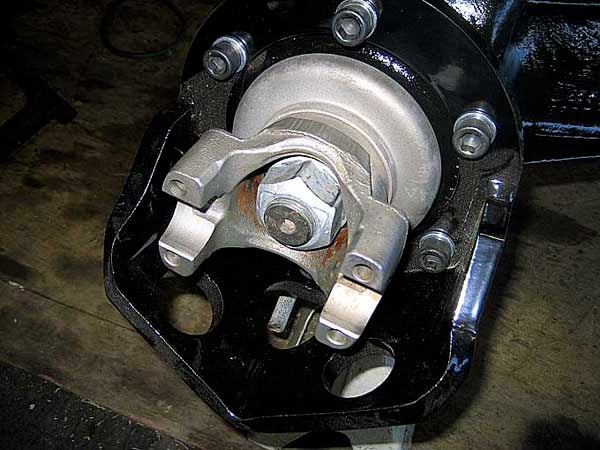
We also wanted to upgrade the brakes from drum to disk (above). Great Lakes Off-Road sent a set of their disk brake brackets. They are made from 1/4-inch steel plate and bolt directly to the 14-bolt axle. The rotors and calipers are OEM Chevy from a 1977, 3/4-ton truck. Everything is a direct bolt-on piece and is easy to install. We topped off the 14-bolt axle with a 1/4-inch-thick differential cover and yoke guard (below) from Great Lakes Off-Road.
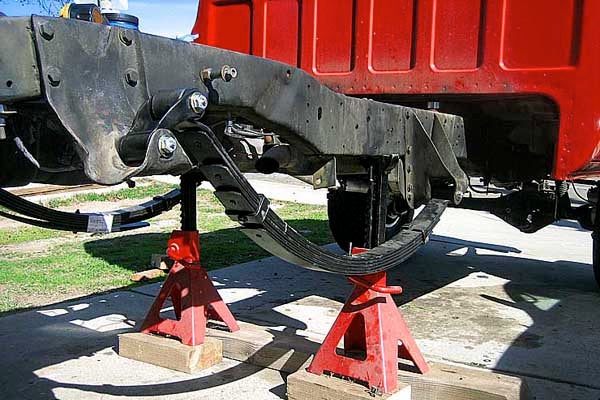
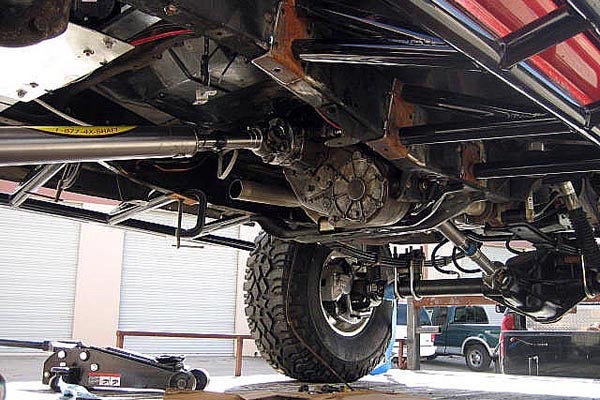
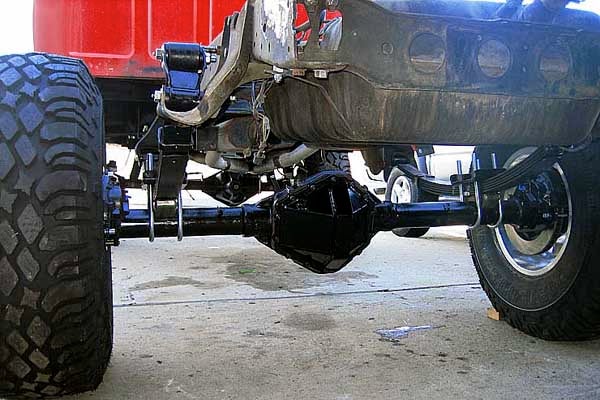
With the 14-bolt fully rebuilt, it was time to get the truck ready to receive its new beefy axle. It started off pretty straightforward. We had to remove the drive shaft, 1/2-ton axle, springs, and the transfer case since it was going to be upgraded from the stock NP208 to a much stronger NP205. With everything out of the way, we installed a new set of Tuff Country 4-inch lift springs (below) and new polyurethane bushings as well as greaseable bolts from Off-Road Designs. Next we rolled the new axle under the truck and bolted everything together using new U-bolts and 1/4-inch thick spring plates again from Off-Road Designs.
PAGE 2
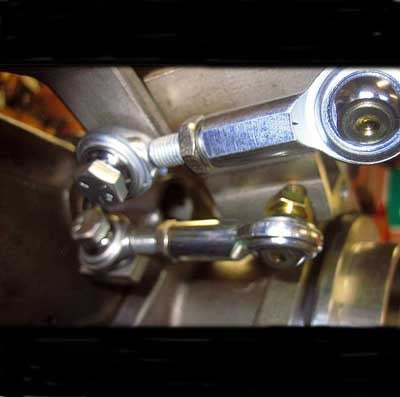 |
With the new axle installed, it was time to get the NP205 transfer case ready to install. The NP205 is all gear driven and much stronger than the chain-driven NP208. We replaced most of the gaskets and seals as well as installed a twin stick kit (above) from JB Custom Fabrication. A twin stick kit can be very handy in some off-roading situations. It allows you to independently select front- or rear-wheel drive in either high or low range. This can be very useful on the trail during a tight maneuver.
Jon from JB designed this kit to be simple to install as well as very low cost compared to other twin stick kits. Jon keeps the cost down by providing detailed instructions on how to modify the OEM shift rails. You simply have to grind away a very small amount of material from the grooves on one of the shift rails. JB supplied the necessary brackets and heim joints to bolt the two new stainless-steel shift sticks to the NP205. The kit comes with two black shift knobs and a shift selector sticker. We decided to upgrade to the billet aluminum shift knobs with engraved gear selection on the top of the knobs. The JB Custom Fabrication twin stick kit was very easy to install and works well. We did have to slightly bend both sticks forward to allow clearance in the cab. This was easy to do with a small torch and a press.
To mate the NP205 to our TH350 transmission we needed an adaptor. The OEM Chevy adaptors are becoming increasingly rare and we were not able to find one. We called Advanced Adaptors in Paso Robles, Calif. Advanced Adaptors manufactures a wide range of adaptor plates, conversion kits, engine mounts, drive shaft yokes, and many other custom parts needed for just about any conversion project. Our kit came with a 27 to 10 spline adaptor, the main adaptor plate to mate the transmission and transfer case, and all necessary gaskets and seals. The adaptor is CNC machined and is made to very tight tolerances to fit perfectly. We had no issues installing it and are very pleased there is a source for these adaptors!
With the transfer case ready to be installed, we quickly found that the transmission had the wrong output shaft – it was too long. This led to removing the transmission and having it rebuilt. We also found a few cracks in the transmission case and the flywheel was damaged. We were finally able to install the transfer case once we welded the transmission case and replaced the flywheel. With the reworked transmission and transfer case installed, we found that the exhaust was resting on the transfer case. This led to a complete rework of the exhaust (above). Who said this conversion would be simple?
We were finally able to bolt in the all new custom Tom Wood’s drive shafts. With 20 years of drive shaft experience, Tom decided in 1999 it was time to open his own shop in Ogden, Utah. Working a few years out of a small garage, Tom eventually moved to a 4800-square foot facility and now has 10 employees. Many times when ordering driveshafts you are really not sure exactly what you need. We found one extremely handy tool when determining what you need is Tom’s Web site at www.4xshaft.com. It is a detail-oriented site about driveshafts with more info than you could imagine. Each page of the site is written in a way that someone with no experience with driveshafts can easily understand, plus you will learn a great deal in the process of reading through it.
Tom makes ordering new shafts very easy with a simple three-step process which is very well detailed in his selection guide. Each custom-made driveshaft is tested and balanced on their balancing machine. Once you figure out what you need, Tom tops it off with free shipping and you usually have your new shafts within a few days!
PAGE 3
 |
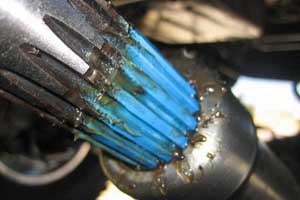 |
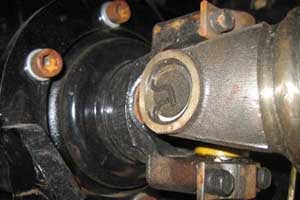
For our project we needed a standard slip driveshaft with 1350 Spicer U-joints in the rear (above left). It was custom made to our needed length. The splines are coated with glide coat to allow them to slip easier and prevent any chance of binding (above right). We also needed a solution for an emergency brake since we no longer have one because of the rear disk brake conversion. Tom sent one of his universal e-brake kits, which consists of a caliper and a few brackets and new transfer case output flange. The driveshaft was made with a flange on the end designed to sandwich a brake disk between the driveshaft and the rear of the transfer case. It’s up to the customer to make the brackets needed to hang the caliper off of the rear of the transfer case.

For our front shaft (above) we needed one of Tom’s all new ‘1310 CV’ type joints, which is a double cardan (CV) joint. A standard 3R series double cardan joint uses smaller U-joints and flexes to about 25 degrees before it binds. If more flex is needed, Tom can remove some material from the joint housing to allow for 5 more degrees of flexibility. In many cases this would work fine, but if there ends up being more than about 30 degrees of flex, a modified double cardan can over flex and possibly cause damage. The fix for this is Tom’s new ‘1310 CV.’ It’s a very strong, custom-made CV center housing. It’s made from cast steel, whereas a OEM housing is made from cast iron. The cast steel is much more durable and will provide a longer life span. It allows for close to 35 degrees of flex before it binds! Since we have a decent-sized lift and 39-inch tires, we decided to try this new driveshaft to prevent any issues while on the trail.
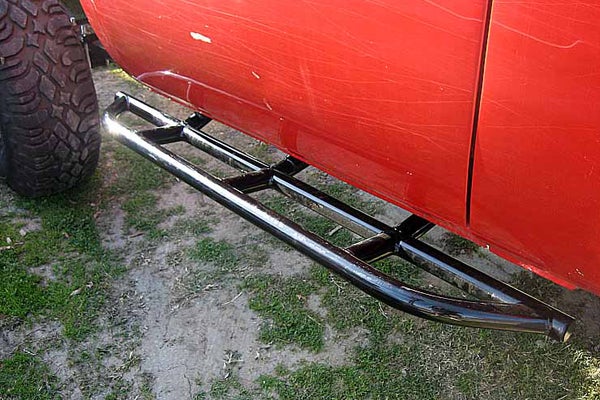
Once the drive train was finished we welded on our custom steps/sliders and installed the bed back onto the frame. With the exception of a few small items, we are ready to hit the trails. Stay turned for a full trail report!
CONTACTS
Eaton Corporation
1111 Superior Avenue
Cleveland, OH 44114-2584
216/523-5000, www.eaton.com
Superior Axle & Gear
9580 Commerce Center Drive
Rancho Cucamonga, CA 91730
888-522-2953, www.superioraxle.com
Tom Wood's Custom Drive Shafts, Inc.
2147 N. Rulon White Blvd., Suite #103
Ogden, UT 84404
www.4xshaft.com
4wdfactory.com
512/759-6267, www.4wdfactory.com
Tuff Country EZ-Ride Suspension
4172 West 8370
South West Jordan, Utah 84088
800/288-2190, www.tuffcountry.com
Offroad Design
484 County Road 113
Carbondale, CO 81623
970/945-7777, www.offroaddesign.com
Great Lake Off-Road
260/387-1428, www.greatlakeoffroad.com
Downey, CA
800/350-2223, www.advanceadapters.com
 Your Privacy Choices