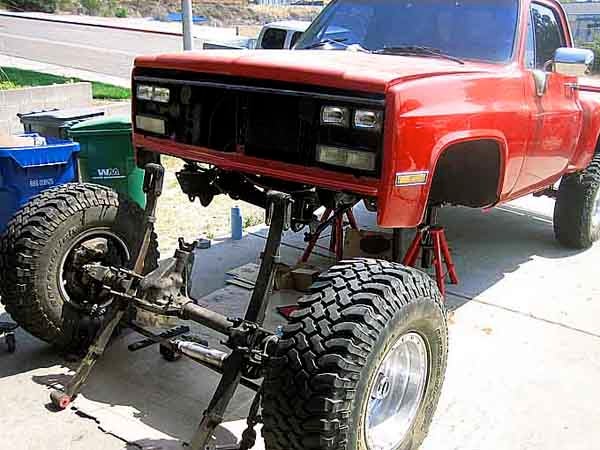
It was a lot of work and seemed to take forever to get our front Dana 60 axle trail worthy but it’s finally time to install it into Project Big Bad Chevy! In this article we will cover our install process and the goodies we used to take the abuse we hope to throw at it someday.
Obviously the first step is to get all the old half ton junk off of the truck. We started by getting the truck set safely on a sturdy set of jack stands. We removed the wheels, disconnected the brake lines, disconnected the shocks, and removed the spring bolts and the whole front axle assembly rolled out from under the truck! While this should have been an easy job, we had to deal with several rusty, seized bolts. Our trusty can of WD-40 and a good Sawzall took care of those pesky bolts!
With everything out of the way we were ready for the new Tuff Country springs. Some people may read this and wonder why we went with Tuff Country. The main reason was price. We were running low on funds and needed some type of spring. Tuff County was the answer. Tuff Country EZ-Ride suspension opened it’s doors in 1988 and currently reside in a huge 53,000 square foot facility in Salt lake City, Utah. They offer a lift kit for all makes of trucks and SUV’s as well as other parts such as pitman arms, shocks, leak springs, and leveling kits.
Our new four-inch lift springs came complete with rubber bushings ready to bolt in. We had already ordered a heavy duty front shackle kit from Stephen at Off-Road Designs in Colorado. You have already read about it and will be reading a lot more about Off-Road Designs since we used many of their parts throughout our build. We will discuss them more in the next article but in a nutshell Stephen at ORD has designed some bullet proof parts for all size trucks. They are well thought out and extensively tested through vigorous trail testing.
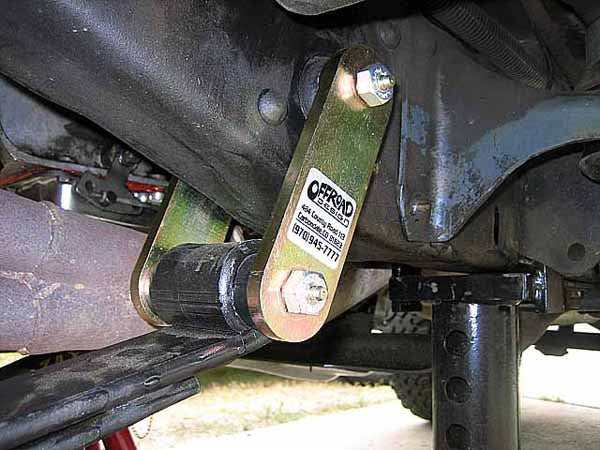 |
| We decided to press out the rubber bushings and install the new HD shackle kit. The kit consists of new Offroad Design's exclusive polyurethane bushings with chromoly sleeves, grade 8, ½-inch greaseable bolts (to upgrade the stock 7/16 bolts) and zinc plated extra thick brackets. The brackets are ½-inch longer to keep the springs from hitting the frame and the greaseable shackle bolts are drilled lengthwise then cross drilled to allow grease to enter the sleeve. The chromoly sleeve is also cross drilled to allow grease between the polyurethane bushing and the sleeve. This system ensures longer bushing life and squeak free operation. We hate squeaks! |
 |
| With the rubber bushing out of the springs, the ORD bushing was effortlessly inserted into the Tuff Country springs and into the rearward frame mounted spring hangers. With the bushings in, we installed the HD shackles onto the frame mounts then hung the springs from them as well as the front spring frame mounts. |
 |
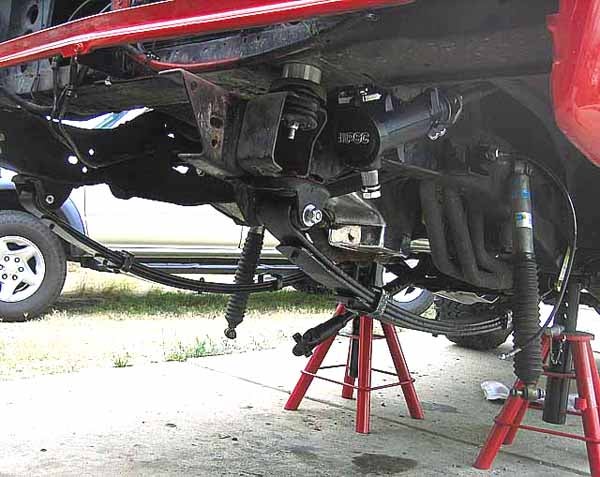
| With the springs installed it was time to roll the new Dana 60 into place. We used some stock GM wheels and tires to roll the Dana 60 around. Once lined up we slid Offroad Design’s Zero Rate Add a Leaves between the axle spring plates and the new springs. We used these blocks to try and gain some extra clearance for our new tires. ORD supplied us with new zinc plated U-bolts and a new drivers side spring plate. |
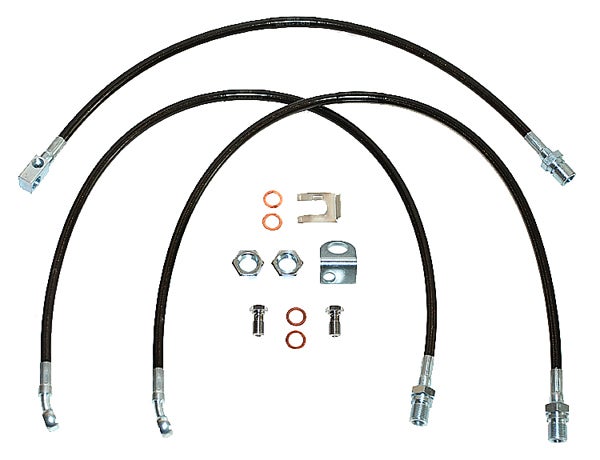 |
| With everything bolted together it was time for the brake lines from ORD. Stephen designed and built his ORD exclusive brake lines. The lines have a Teflon core, which is covered with a Kevlar braid, then a stainless braid is applied and the whole line is covered with a protective vinyl outer shell. The fittings are a one piece crimp design and each line is individually pressure tested to ensure no leaks. To top off the already tough brake line, they are DOT approved! |
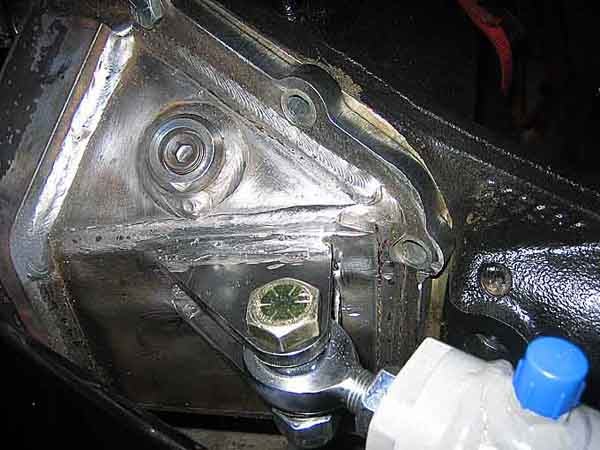 |
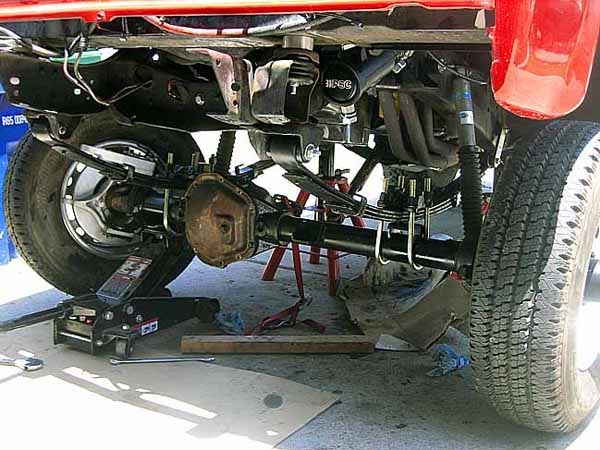
| Next we installed the massive Great Lakes Offroad (GLO) differential cover. It features a ½ inch thick bolt ring and a one piece CNC formed ¼ inch cover. The cover is topped off with a few extra options like a machined 1-piece fill plug, a well protected integrated drain plug, and an extra ½ inch thick plate across the nose of the cover. This extra plate not only provides bomb proof protection to your ring & pinion but also makes a great mounting point for a hydraulic ram. This cover is all beef with beautiful welds and weighs close to 15 pounds! Shawn at Great Lakes Offroad offers a unique warranty on their differential covers. It states “Warranty ( No B.S. Fine Print )You break it under use we replace it and add you to the hall of fame as it has never been done in the last 5 years.” Shawn at GLO also makes other heavy duty products such as rear 14 bolt axle brake caliper brackets, weld on beadlocks, H1 wheel parts, Dana 60 top plates, and rear axle yoke guards. We had Shawn send his brake caliper brackets and yoke guard to use on our rear 14 Bolt axle. |
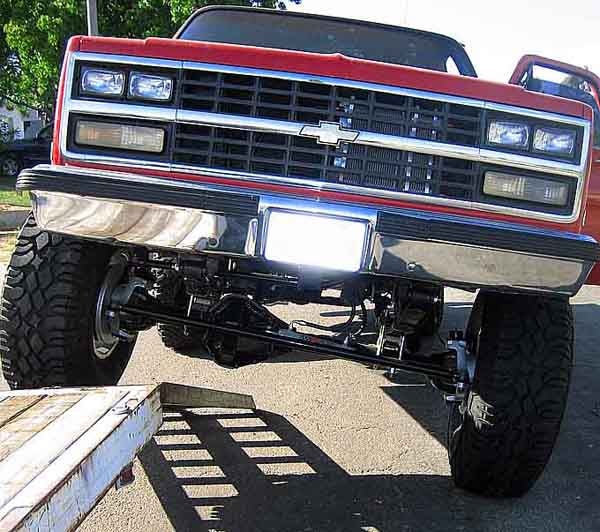 |
| The final few steps are to install the drive shaft and shocks as well as bleed the brakes and torque all the bolts to proper specifications. Installing or new Dana 60 axle was pretty simple which were able to do it in a few hours. It looks strong and we look forward to fully testing it out on the trail. A quick flex test at home revealed some less than desirable flex results, more on that later. Stay tuned for our upcoming steering upgrades! |
www.tuffcountry.com
Tuff Country EZ-Ride Suspension
4172 West 8370
South West Jordan, Utah 84088
(800) 288-2190
customerservice@tuffcountry.com
www.offroaddesign.com
Offroad Design
484 County Road 113
Carbondale CO 81623
(970) 945-7777
stephen@offroaddesign.com
www.greatlakeoffroad.com
Shawn @ 260-387-1428
shawn4x4@greatlakeoffroad.com
|
Off-Road.com Newsletter Join our Weekly Newsletter to get the latest off-road news, reviews, events, and alerts! |
Follow @Off-Road
 Your Privacy Choices